Pretty Pretty Bows

Posted on

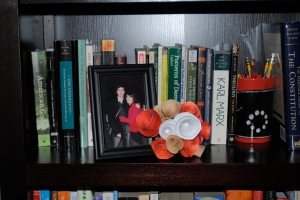
I want you guys to know something about my latest crafting adventure.  It was not easy.  It actually took a lot more brain power than most of my projects.  HOWEVER – take it as a testament to how much I love all of you readers that I persevered through the challenges and ultimately prevailed to bring you… TA DA!  Felty gift bow thingies.  I probably need to work on a title for this sucker but we’ll leave it for now.

Sometimes I browse around on crafting sites and blogs wishing I could buy everything I see!  Lately I’ve been seeing tons of felt flowers and bows popping up that I absolutely love to today I sat down with nothing but determination and some craft supplies to figure out how to make some gift bows out of felt.  I’m going to try to consolidate my trial and error and bring to you, my dear wonderful readers, nothing but felt bow win.

Start out with a few blue felt strips about 4 1/2 inches long.  I cut four but only used three.

Next, sew the three strips into circles.  In the picture, I have an extra little loop that I didn’t end up using because it was too small so disregard it, but we’ll come back to the concept a little later.

Fold the circles so that the middle portion is flat and stitch them together.  Stagger them so that the ends peek through each other.  When making your stitches, you don’t need to make a ton of stitches because it will hold together pretty easily.  Don’t worry too much about “stitching outside the lines” because you’ll cover the stitches up later!

Cut another three strips, this time just about 6 inches each.  I cut the three at slightly different lengths, the shortest being 6 inches.  Each one was just a tad bigger than the last because I figured it would take just a little more fabric to wrap around the bow as it got bigger.

Again, sew these into circles, lay them flat, and sew them into the bow.  Stagger them the same way you staggered the first three circles.

The last step is to sew a little loop in the top if the bow.  It finishes the bow and acts as a coverup for all of the ugly stitches you’ve inevitably made throughout.  Stitch one end of the felt into the bow first and then loop it around and make another few stitches to hold it all together.

There are loads of things you could do with this from here – add it to a headband or a safety pin oooor whatever the heck else you feel like doing with it.

Heidi

AAAAAAAHHH!!! BREAD!!!

Posted on

On my quest to become the High King of man-food, there have been ups (my pretzels) and downs (BAKED potato chips). I’ve gained a lot of insight, some good culinary wisdom from some good sources, and, of course, sustained more than my fair share of grease burns. So many grease burns. But I’m starting to get a handle on my style, and I’m picking up, slowly but surely what the right way and what the wrong way is. Having proved myself in the fried arena, I’m moving on to pizza night, and all that it entails, including the always imperative bread loaf.

I stumbled across a simple yet delicious recipe last week, focusing searches on ingredients I had laying around:

Ingredients

  • 2 cups warm water (100 degrees F/40 degrees C)
  • 1 tablespoon white sugar
  • 1 tablespoon active dry yeast
  • 1 tablespoon salt
  • 4 cups bread flour, or as needed
  • 1 cup shredded mozzarella cheese
  • 1/4 cup milk
  • 1 tablespoon dried basil
 

Directions

  1. Mix warm water with sugar in a large mixing bowl until the sugar has dissolved. Sprinkle yeast over the surface of the water, and let stand until the yeast begins to form a creamy layer on the water. Stir the yeast into the water. Stir in salt, and 1 cup of bread flour, and beat the flour in to form a loose batter. Stir in 1 more cup of flour, and mix in the mozzarella cheese, milk, and basil. Mix in the remaining 2 cups of flour in 1/2-cup additions.
  2. Turn the dough out onto a well-floured work surface, and knead until the dough is thoroughly mixed, but still sticky, 5 to 8 minutes. Add flour into the dough as you knead, if necessary. Form the dough into a ball, and place into an oiled bowl. Turn the dough over in the bowl to oil the surface of the dough, and cover with a cloth. Allow to rise until double, about 1 hour.
  3. With your fist, press firmly on the dough to deflate the large bubbles. Turn the dough out onto a well-floured work surface, and knead the dough just long enough to eliminate the remaining bubbles in the dough, about 1 minute. Cut the dough into 2 equal pieces, and form each half into a round ball. Spray a baking sheet with nonstick cooking spray, and place the balls onto the baking sheet. With a sharp knife, slash an X into the top of each loaf. Cover the loaves with a towel, and let rise until doubled, about 25 minutes.
  4. Preheat oven to 425 degrees F (220 degrees C).
  5. Bake the loaves until browned, about 25 minutes. To serve, cut each loaf into 8 wedges.
REAL EASY! REAL STRAIGHTFORWARD! I love it! Here’s some tips when baking this
 – Use two full packets of yeast. It’ll make the bread fluffier and spongier than the recipe indicates.
 – Of course, you’ll have to stir a bit more flour into the mix, but you’ll get BIG loaves.
 – This bread needs a dip! I’m a big fan of infused olive oil. The morning you’re gonna bake the bread, or better yet, the morning before, pour some olive oil into a jar, then drop in basil, some peppercorn, or failing this, some italian seasoning, then seal it up. When serving the bread, pour the oil into a plate for dipping, sprinkle in some more herbs, and top it off with some mozzarella or parmesan in the middle.
Hope it’s enjoyable! I’ll be writing sometime next week about a pizza attempt!
Phil

Designer Highlight – Peter Sid

Posted on

Peter Sid is a designer who I have been following for a while.  I first found out about him on a favorite website of mine and wrote about him here on my first blog.  He really is a fun and very talented designer (Obviously!  I mean, c’mon – we don’t write about just anyone on the Loftbirds blog!).  I was amazed by the chandelier he created out of chemo files.  He called it “Bottles of Hope” and used the chandelier as a way to show that cancer can be beat and something beautiful can come of it.  Geez – talk about using your powers for good.  Recently Peter contacted me recently (he found out how much I loved his designs when he found my post about him on the old blog!) and told me about some of the things he’s been working on lately.

Okay so first, you need to check out this guy’s website – especially if you’re into really modern, industrial, masculine design.  But seriously, even if that’s not your deal, he’s very talented so it would be well worth your while to browse around a bit.

The piece he wanted to show me when he sent me that message was this city scape mirror.  I simply can’t get over how amazingly talented Peter is.  Just look at the detail that went into that mirror.  It’s a laser cut mirror and the skyline is a replica of an industrial skyline in Connecticut near where he spent his childhood.

Alright, enough bursting at the seams for me.  Check it out for yourselves and let me -or better yet let Peter – know what you think!

Heidi

Why DIY?

Posted on

The deeper I get into the world of DIY, the more I want to know exactly why it is that I do what I do.  I think that for a lot of people who are DIY-ers,  it’s more than just a hobby.  There’s a lot more behind the world of DIY that makes it so appealing.  This post is about why I feel so strongly about having the ability to make and build things on my own or with the help of people I know and love.

My first reason is actually kind of a minor point, which might surprise some people that know me well, but it is my belief in supporting local business.  I was raised by an artist and so I understand the struggle of small business owners but I also understand the value they add to society.  Having a background in political science, I believe in building community and economy from the ground up.  What better way to do that than supporting local businesses that often times put right back into their communities?

Anyway, I am about to digress.  So on to point two!

The number one reason why I love DIY comes from Proverbs 31 from the Bible.  If you’re not familiar with the passage, it’s basically a description of the perfect woman (or, to be more specific, the perfect wife – talk about pressure!).  According to this passage, the perfect wife is essentially this really overwhelming woman who can do everything her family could ever possibly want or need done by herself.  It says things like “she selects wool and flax and works with eager hands” and “she considers a field and buys it; out of her earnings she plants a vineyard.  She sets about her work vigorously.”

Basically, this woman makes everything for her house by hand and never sleeps.  She’s almost completely self-sufficient.  She’s a business woman, a mother, a chef, and most importantly – a DIY-er.  It’s a lot to live up to, but it explains a lot about why I think DIY is so important.

The passage says other things about her like “she makes covering for her bed”, “she makes linen garments and sells them, and supplies the merchants with sashes” and “she watches over the affairs of her household and does not eat the bread of idleness.”

Is anyone else stressed out by this at all?  I definitely am.

Heidi

Spoiler Alert!

Posted on

I love to make greeting cards.  I’ve tried to figure out what it is about these little boogers that I love so much – is it that I love handwritten correspondence?  Maybe because of the calligraphers in my family?  Is it because I like bold colors and geometric shapes and those things are easy peezy with greeting cards?  Psh I don’t know.  But who cares, right?  The point is I enjoy making greeting cards.  Wait – that’s not the point.  I just got on a rant about how I love making greeting cards!  The real point of this post is that a week ago I got my first real order for greeting cards!  My lovely friend Katie asked me to make her 15 cards.  I rose to the challenge and now I’m sharing them with you!

Katie, if you’re reading this and want to be surprised about what they look like, stop reading!  Stop it!

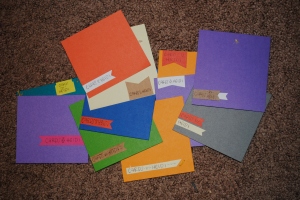
I made her a few cards folding cards and then a bunch of notecards.  They were super fun to make because I watch a ton of design shows (I’m talkin’ Project Runway and Design Star!) so I’ve been thinking about branding and creating a style and stuff that I really don’t need to be thinking about – but I am!  So I made the cards all different but with some definite similarities.

The flags are definitely becoming a signature feature on my cards, as are hearts.  However, turn your attention to my favorite card: the green one with the little red circles that look like dice from far away.  They’re actually squares cut from one of those “keep this coupon” things that you get when you enter a raffle!  I was too excited when I found them.

Hey – speaking of flags – check out this branding:

I thought it would be a nice touch to throw in some envelopes for Katie so she’ll be getting these:

And thrown together, the whole thing looks like this:

I’m very excited about the whole thing!  I hope Katie likes the cards just as much as I do!

Heidi

Registry Review

Posted on

Last week or so I promised a review on the online gift registry I had chosen to use to register for wedding gifts.  Well folks, here it is!

As you no doubt figured out (uhm, because we told you!), we ended up trying out myregistry.com for our wedding & shower registry.  Spoiler alert: overall, I think it’s fantastic.  Here are the details:

Myregistry.com is great.  It has allowed for us to sync our Crate & Barrel, Sur La Table and CB2 registries with the items we want that are on sites that don’t have registries (etsy & ikea, mainly).  But also our favorite thing on our registry so far:

(The gurgle pot, not the baby… although I can totally relate to her awe)

It has also allowed us to register for items in stores we like but that we don’t want to sign up for and get all kinds of annoying spam.  Of the sites I looked at, it offered the best selection of stores to sync with, a bonus that should definitely not be overlooked!  See, the cool thing about registering for specific stores is that a lot of them will give you a discount for 6 months – a year after you get married (bank!).  So being able to register for stores AND sync them to your online registry is definitely the best of both worlds.

I also love that you can track who has been on your registry and who has purchased things.  This immediately sounds super greedy but I promise you it’s not!  The best feature that a lot of registries offer (not just myregistry!) is the “thank you tracker” feature.  Or whatever it’s called.  It tells you who bought what to make writing thank you cards that much easier.  Imagine if you had a big shower and forgot to keep your cards with your gifts?  What a disaster!

Overall, I give myregistry.com a bunch of stars.

There are, however, a few minor issues with it.

1) It’s just a little bit difficult to navigate.  There are a lot of tabs and sometimes it can be hard to figure out just what tab will take you where you want to go.

2) It doesn’t automatically update for some stores.  If a friend buys something from a site that isn’t synced with myregistry, they have to update it themselves.  Myregistry makes this easy enough (when the buyer navigates from the main myregistry page to the other site to buy by clicking on “view of buy this gift,” another window pops up and asks if you bought the item and how many or if you were just looking.  As long as your loved ones are attentive, you shouldn’t have a problem.

That’s really about it.  Overall I think this website is wonderful!  I was super stoked when I registered for my first item:

Maybe even too excited!

I want to hear your registry stories – what did you register for that you loved?  What did you register for that was just a waste of space?  Do you even look at registries when shopping for wedding gifts?

Heidi

Always Affordable, Never Dead Flowers

Posted on

This post is living proof that you can make anything out of anything.  Seriously, if there was ever doubt, stop it.

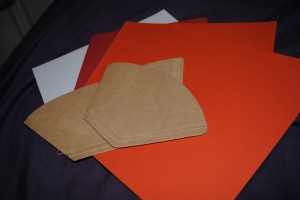
Today, using inspiration from the Jones Design Company blog, I created the cutest and least expensive bouquet of flowers I have ever seen.  These were my materials:

  • Cardstock (approx 5 sheets)
  • Coffee filters (approx 2 filters)
  • Hot glue (always)
  • Green bendy straws ($1 if you buy an off-brand!)
  • Wire
  • and, of course, scissors!

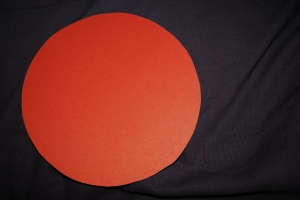
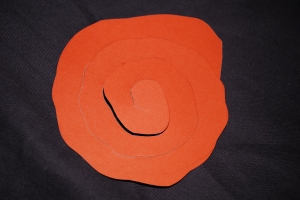
I started out by making the flowers basically as shown in the tutorial that I found on the JDC blog.  First, cut a circle out of cardstock.  You’ll make all different size flowers so don’t worry too much about how big the circle is, although I think 8″ is typically as big as you’ll want to go.  Next, cut a spiral into the paper.  In the tutorial, she gives the option of cutting a circle and then a spiral or of just sitting a spiral right into the square piece of paper that you’re using.  I found the latter to be a bit easier for me, so try both to see which works best for you!  She also suggested using uneven edges, which gives the flower a cute effect.

Once it’s cut, roll the flower tightly starting at the outer most edge of the spiral.  Hold it for a few seconds and the release.  The rolled cardstock will unravel slightly and take the shape of a flower. If you’re using a flimsier material, like the coffee filters that I made some flowers from, you may need to hold it for just a little bit longer but it will work.  And when is a repurposed material not a welcome surprise in anything?

Then, it’s hot-glue time!  put a dab of hot glue on the base of the flower and hold the rest of the spiral on top of it for a few moments, until the flower is secure.

Here’s where I really begin to differ from the tutorial I found.  On the tutorial they used green floral wire as stems for their flowers.  I’m sure this works great – if you’ve got it.  I didn’t have it, though, so I used bendy straws!  I cut the straw at the bottom and the top (making the bloom closer to the actual bendy part) and put a ring of hot glue around the top rim of the straw.  Attach and hold.

Once you’ve got a bunch of these, hold them all together at the “stems.”  Arrange the flowers how you want them, using the bendy parts of the straws to get a more exact placement.  Then, hold all the straws together tightly (you may need someone else to hold them) and wrap wire around them several times and fasten.  Trust me on this one.  It was a total fluke that I ended up doing this but I think it was the best decision I made!  The wire really holds the straws in place much better than ribbon or tape would have and you can wrap ribbon around the wire later if you don’t like the look of the raw wire.

Then just arrange in a jar or a bookshelf….

… and enjoy flowers that won’t die!

I tried some coffee filter flowers (which worked phenomenally!) but you can use literally anything!  Try newspaper or magazine pages, birthday cards from years past, love letters, or sheet music!  The possibilities are endless.

Heidi

‘Naner Bread

Posted on

Being poor, I’ve been on this kick lately of using everything I have in my cupboards and craft room and not wasting a single thing.  I’ve been realizing just how much food I throw away because I’m only one person and can only eat so much food!  The number one thing that goes to waste are bananas and the obvious solution to this is BANANA BREAD!

Now, I found an okay banana bread recipe.  It’s really basic and I pretty much stuck to the recipe so it turned out just like regular banana bread.  Therefore, this blog post is not about my banana bread recipe (although I will post it because it’s a great starting point).  This blog post is about motherly and friend-erly advice in regards to banana bread.

First, here is the recipe I used:

INGREDIENTS:

  • 2 cups all-purpose flour
  • 1 teaspoon baking soda
  • 1/4 teaspoon salt
  • 1/2 cup butter
  • 3/4 cup brown sugar
  • 2 eggs, beaten
  • 2 1/3 cups mashed overripe bananas

DIRECTIONS:

  1. Preheat oven to 350 degrees F (175 degrees C). Lightly grease a 9×5 inch loaf pan.
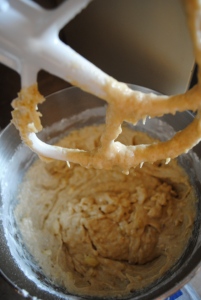
  2. In a large bowl, combine flour, baking soda and salt. In a separate bowl, cream together butter and brown sugar. Stir in eggs and mashed bananas until well blended. Stir banana mixture into flour mixture; stir just to moisten. Pour batter into prepared loaf pan*.
  3. Bake in preheated oven for 60 to 65 minutes, until a toothpick inserted into center of the loaf comes out clean. Let bread cool in pan for 10 minutes, then turn out onto a wire rack.

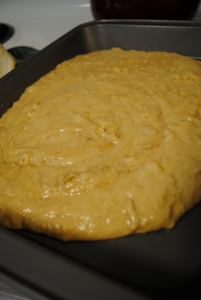
*I don’t have a bread loaf pan (yet!) so I used a dark brownie pan and, as it turns out, it tastes exactly the same – it just doesn’t have the fancy schmancy shape!

SO EASY.  SO BASIC.

So here’s what my mom had to say: “Did you add nuts to the recipe?  Heidi!  You should have added nuts to the recipe.”  Yeah, that would have been good.  The comments on the recipe on allrecipes.com said to add some spices and things but I figured I’d start with the basic recipe and just learn from there.  My roommate (who will be launching her baking blog – Not Your Mama’s Oven But All Her Lovin – soon) suggested that next time I add chocolate chips to the recipe.  Okay now that would have been delicious.

Here’s another great tip from my mom.  I probably should have known that I could do this but I didn’t.  So we learn.  Her advice was to cut up overripe bananas and freeze them!  This comes in handy in two situations: 1) You have overripe bananas but aren’t ready to make bread!  2) You used only a tiny bit of a banana and don’t want to waste the rest.  Genius.  Thanks, mom 🙂

To summarize: try adding nuts and/or chocolate chips to this banana bread and freeze the rest of the bananas.

Now on to search for the best banana bread recipe.  What’s your favorite banana bread recipe?  I’d love to try some!

Heidi

X_________________.

Posted on

To us, a wedding is all about the people who are there.  Yes, of course ours will be a celebration of our love and blah blah blah but you don’t  every single person you’ve ever met to your wedding (unless you’re like, some kind of Duchess in line to be Queen or something).  You invite people who really mean something to you.

When Phil and I got engaged, he did such a good job of incorporating a lot of the people who had helped shape us and support us as a couple.  That, to me, set the tone for our entire wedding story & life together – we want to celebrate the people who build us up and love us.  And we want to love them in return!  Therefore, we really want the people invited to our wedding to feel very special and we want a special way to remember who was there.  This is why a guest book is so incredibly important to me.  I have a good idea in mind for the guest book that I want (I’m not going to reveal it because I don’t have all the details nailed down just yet) but there are so many other good ideas that I’ve had to pass up that I wanted to be able to share a few with you.


1. I think these guest books are a great way to encourage guests to write more than their names.  Some ask for marriage advice, others inquire as to what guests were thinking when the bride and groom were saying their vows.  You could ask whatever you want – just make sure its something you want to know the answer to!

2. Talk about making guests feel special!  With this guest book, you have an easy way to keep track of birthdays and send cards whenever one of your closest friends or family members turns another year older!  I would not do this with a large group or you’ll be doing nothing but sending cards – but this would be great for a small event.

3. If you’re inviting guests with good handwriting, this is a beautiful way to display it!  Find plates at flea markets or antique stores for a really unique look.  Or, for something that will last even longer, buy porcelain plates and porcelain 150 markers from Michaels.  After the wedding, bake your dishes at 300 degrees for 35 minutes and, voila – a gorgeous, this-will-last-forever guestbook.

4. This guestbook perfect for a couple with friends all over the place.  You could have guests sign the map anywhere OR cut up scraps of acid-free paper and have guests write notes to you, sign their names, and using a pin, stick the notes onto the map corresponding to where they’re from.  To make this work with ease, attach the map to a bulletin board before the wedding.

5.  What an awesome way to incorporate a typewriter into a vintage wedding.  A lot of vintage-inspired weddings will have props like this sitting around for decoration but I love that this couple has put their prop to good use.

6. If you’re a quilter, or maybe just moving to a cold climate, this is a great way to get a lot of use out of your guest book.  Buy fabric markers in a variety of colors (different colors show up best on colored fabric squares) and have guests make a square their own.  Start this one early if you’re making it yourself and be sure to have enough squares for every person, couple, or family!

7.  I can see this being used in a graphic designers wedding.  It’s fairly popular to have a “logo” for your wedding – it could be a monogram or something more funky (like the graphic shown in this picture) – either way, just print the logo on acid-free paper and have your guests sign in rows below.

8. This is one of my favorite ideas.  Again, you better hope your guests have good handwriting, but if you need to buy furniture anyway and you’re cost cutting, just combine a piece with your guestbook!  You might even ask a friend to build a bench for you as his or her wedding gift to the two of you.

9.  I put this one up because I love the way they displayed the guestbook.  Tables can be pricey to rent and a little generic at times.  I love that this couple thought to use an easel.  It makes the guestbook more prominent and purposeful as well.

10.  This is a fun twist on something we’ve all seen before – the signed mat.  I’ve never been a huge fan of this approach but the fact that this couple framed art instead of a picture of them makes it seem like a fresh, new idea.

11. A puzzle.  Is there really anything left to say?  I love this idea!  You could piece it together afterwards and frame it or put it on your game shelf.  Either way, it’s a welcome surprise.  Just make sure guests don’t sign on the wrong side or it will never fit together!

There are so many ideas for guest books out there that it can be overwhelming!  These are just a few that I pulled from Pinterest.  My guest book is still in the ol’ noggin but it will come to life sooner or later and I can’t wait!

Heidi

Wedding Dilemma 2: Ugly Chairs

Posted on

This book that I bought is stressing me out – in a good way.  Last night I sat down with it an thought long and hard about my budget.  The budgeting tools on the Knot and Wedding Wire are great – but they’re almost too easy.  I can look at my budget on their sites and say “yeah!  I can work this out.  I’ll just go under budget on a few things and use that money to pay for x, y, and z – no problem.”  Having to do a budget by hand, however, is a totally different story.  Like I said, stressful.

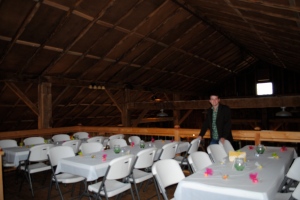
So I’m set on having a band and going with less expensive catering (read: sandwiches) but I still have a problem.  The venue that I’m using comes with tables and chairs.  Great, right?  Wrong.  The chairs are simply awful.  I’ve tried to look at the good in them (they’re white, they’re comfy, they’re white…) but there’s just no getting past these hideous chucks of plastic.

The way I see it, I have five options:

1) Leave ’em.  They’re ugly but they’re free and I can spend my money on something I care more about… like the band.

2) Rent chair covers.  But those are $1.50 per cover (est. $300) and are equally as ugly.  I think that’s just a waste of $300!

3) Try to cover them up some other way.  I could tie big bows around them but then they’re merely masked, not hidden, and that’s a lot of bows.

4) Rent garden chairs.  To rent 150 garden chairs will cost me $412.  Too bad I have to rent 300 garden chairs if I go this route.  That’s $824 and while these chairs are beautiful, that’s a big number for chairs.  (Part B of option 4 – invite less people, spend less money on chairs & catering).

5) Use the chairs from the ceremony and move ’em all inside after wards!  This would be a stretch, and I would rule it out right away but I hate to rule things out right away.  Can anyone make this work for me?

So there you have it – wedding dilemma no. 2.  It’s a doozy.  Does anyone have any creative ideas for me?  Any advice?  A place in Cincinnati that will rent cheaper chairs?  Let’s hear ’em!

Heidi